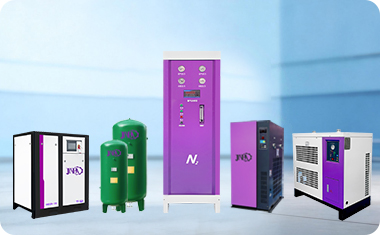
Setting up a home nitrogen generator correctly is the foundation of stable and safe operation, and this step-by-step setup guide is tailored specifically for novice users with no professional equipment operation experience. The entire setup process is divided into site preparation, hardware assembly, power connection, system debugging, and post-setup inspection, with every operation simplified and standardized for household scenarios. First, site selection and preparation are critical. Home nitrogen generators rely on ambient air for nitrogen separation, so the setup environment must have clean, dry, and dust-free air. Avoid placing the device in kitchens with oil fume, bathrooms with high humidity, or garages with excessive dust, as impure intake air will block the filter, reduce nitrogen purity, and damage internal molecular sieve components. The placement surface must be horizontal and load-bearing, with no tilt, to prevent internal pipeline pressure imbalance. Reserve sufficient ventilation space around the machine to ensure the cooling fan can work normally and avoid overheating shutdown.
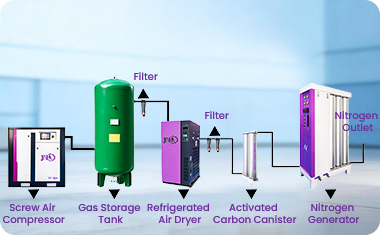
The second step is hardware assembly and pipeline connection. Take out all supporting accessories from the package, including air intake filter, gas output hose, quick connector, power cord, and tire inflation nozzle. First, install the air intake filter at the reserved air inlet of the generator, tighten the interface clockwise to ensure a tight seal, and avoid air leakage of raw air. Then connect one end of the dedicated gas output hose to the nitrogen outlet of the generator, fasten the quick connector firmly until a clicking sound is heard to prevent falling off during air output. For universal home use, install the multi-functional adapter at the other end of the hose to adapt to tire inflation, food cans, and other usage scenarios. Third, complete power connection: use a standard household 220V grounded socket, avoid plugging with high-power electrical appliances to prevent voltage instability, which will affect the generator’s pressure stabilization system. After power-on, the device starts automatic system initialization, including pressure sensor detection, molecular sieve preheating, and pipeline self-inspection. Novices should wait patiently for 3 to 5 minutes without pressing any functional buttons arbitrarily.
The final setup steps are parameter preliminary debugging and overall inspection. After the device enters standby mode, check the real-time pressure displayed on the control panel to ensure it is within the standard household working pressure range (0.4–0.8MPa). Conduct a simple air tightness test: block the gas outlet, let the machine pressurize for 2 minutes, and observe whether the pressure value remains stable; if the pressure drops rapidly, check each interface for air leakage and re-tighten the pipeline. Confirm no faults and air leakage, the setup process is successfully completed. For first-time setup users, it is not recommended to adjust advanced parameters such as purity and flow rate arbitrarily; use the factory default household parameters first to familiarize with the device performance. After setup, record the installation date for subsequent regular maintenance, laying a solid foundation for long-term stable use of the equipment.